
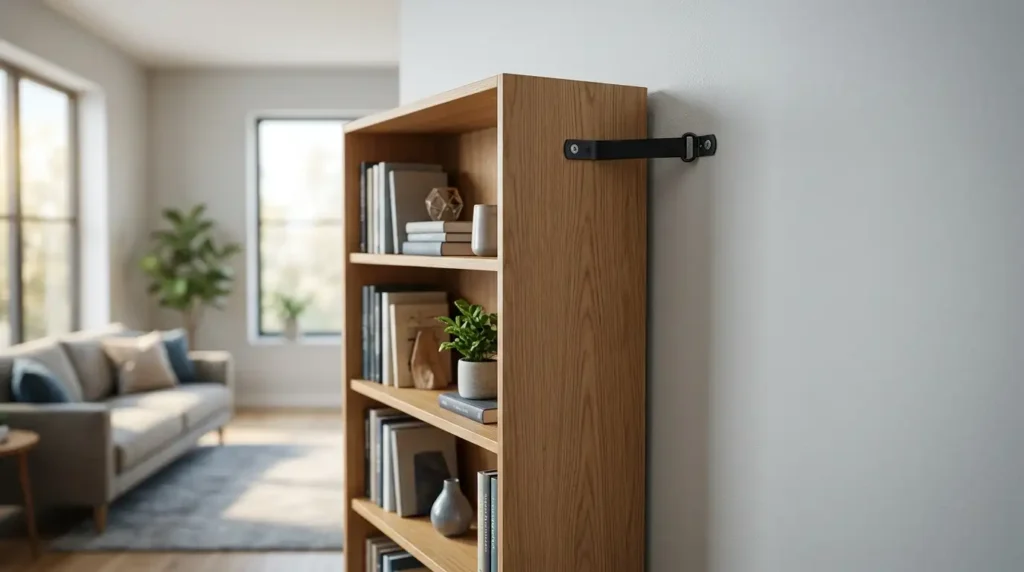
A toddler in Minneapolis can open three dresser drawers and climb them like stairs. A tall dresser can fall in a blink. Here is how to anchor tall furniture safely: find a wall stud, fix a rated strap or bracket to the furniture and to that stud, and pull it snug. I have done this in bedrooms, nurseries, and home offices, and it is a simple weekend job. This guide covers tools, wall types, renter tips, and common mistakes. Grab your drill, and let us get started.
Why Is It Important to Anchor Tall Furniture?
Anchoring is cheap and quick. A fall is sudden and serious. Let me show you why furniture tip-over prevention matters in everyday homes. For more ideas, read our furniture safety tips for families.
Understanding Furniture Tip-Over Accidents
Tall, narrow pieces have a high center of gravity. A small nudge can tip them. Open one drawer and the weight shifts forward. Open three, and the whole unit may come down.
Kids raise the risk. They climb to reach a toy or a snack. A bookcase turns into a ladder. A dresser turns into a step stool.
The numbers back this up. The CPSC reported about 17,800 emergency room visits a year for tip-over injuries, using data from 2020 to 2022. Children and older adults face the most risk, according to the CPSC Anchor It! update.
An earlier CPSC report counted 581 tip-over deaths since 2000. Of those, 472 were children. A piece can look heavy and still fall. Weight does not equal stability.
Hidden Tip-Over Risks Beyond Open Drawers
Drawers are not the only trigger. A heavy TV on top of a dresser adds weight high up. That raises the tipping risk. A top shelf packed with books does the same.
Pulling matters too. A child may hang on a door or a rail. An adult may lean on a tall piece to reach something. Either move shifts the load forward.
Bumps count as well. A vacuum, a toy cart, or a pet can knock a loose piece. Strong shaking can do it in some regions. Nobody plans for these moments. That is why anchoring works so well. It guards against the surprise.
Small habits help. Keep heavy items low. Keep light items high. Then add the anchor. Together, these steps lower the chance of a fall in any room.
Which Types of Furniture Need Wall Anchoring?
Any tall or top-heavy piece can tip. Start with these:
- Tall dressers and drawer chests, especially in a kids’ bedroom
- Freestanding bookcases and shelves
- Wardrobes and armoires, like the ones in our wardrobe and armoire ideas
- Storage cabinets and kitchen pantry cabinets
- Tall filing cabinets and home office storage furniture
- Freestanding TV stands and entertainment centers
Do not forget the TV. The CPSC says to anchor TVs and furniture. If you cannot anchor a TV, set it on a sturdy, low base. Push it back as far as you can. Keep cords out of reach.
How Furniture Anchoring Protects Children and Families
Anchoring lowers the chance of a forward fall. It also helps when a child climbs. This matters most in bedrooms, nurseries, and playrooms. Setting up a baby room? Browse our nursery furniture ideas, then anchor each piece.
Anchors do not replace adults. The CPSC still urges close supervision, even in rooms where furniture is anchored.
CPSC Acting Chairman Peter A. Feldman said in February 2026 that anchoring TVs and furniture is “a quick, effective step” that can save lives. You can read the full message in the CPSC release.
Adults gain too. Older adults can be hurt by a falling piece. Guests and pets can be hurt as well. Anchoring protects everyone in the house.
Why Older Adults and Pets Matter Too
Tip-overs are not only a child issue. The CPSC reported that injuries to adults 60 and older from furniture tip-overs have risen over the past decade. An older adult may lean on a dresser for balance. A loose piece can shift under that weight.
Pets are at risk as well. Cats climb. Dogs bump into shelves. A small animal can get trapped under a fallen piece. Guests face the same danger in your home, since they do not know which pieces wobble.
So think of anchoring as a house rule. Treat every tall piece the same way. Then no room has a weak spot.
Tools and Materials Needed to Anchor Tall Furniture
The right gear makes the job easier. It also prevents loose screws and ugly holes. Here is my go-to list.
Essential Tools for Furniture Anchoring
Gather these before you start:
- Cordless drill and bits
- Phillips and flathead screwdrivers
- Stud finder
- Measuring tape
- Pencil or masking tape
- Level
- Safety glasses
- Flashlight
If your toolbox is thin, see our list of essential furniture repair tools.
A quick tool guide helps first-timers. I like to lay every item out first. It saves a second trip to the hardware store, and it shows what each tool does.
| Tool or material | Main purpose | Important consideration |
|---|---|---|
| Stud finder | Locate wall studs | Confirm the reading twice |
| Drill | Create pilot holes | Match the bit to the screw |
| Anti-tip strap | Connect furniture to wall | Follow the kit instructions |
| Metal bracket | Give a rigid connection | Check that it fits your piece |
| Level | Check furniture alignment | Use it on an even surface |
| Measuring tape | Mark install points | Measure both sides |
How a Stud Finder Works and Which Type to Buy
Most stud finders sense changes in density behind the wall. Wood is denser than empty space. The tool lights up or beeps when it finds that change.
Electronic models are the most common. They are simple and cheap. Some have a deep scan mode for thick walls. Magnetic models find the nails or screws that hold the drywall to the stud. They need no battery. They make a handy second check.
Start by setting the tool on an empty patch of wall. Then scan. Expect odd reads near corners, pipes, and wires. Plaster can confuse some models. That is why a second method helps. Compare your marks to the 16 or 24 inch pattern you expect. If the numbers do not fit, scan again.
Essential Anchoring Hardware
Hardware matters as much as tools. You need:
- Anti-tip furniture brackets
- Nylon furniture safety straps
- Metal furniture restraint brackets
- Screws supplied by the kit maker
- Wall fasteners that suit your wall material
Use the screws in the box. Short or random screws can fail. If the kit does not fit your wall, do not improvise. Ask the kit maker or a pro what to use.
Optional Tools That Make Installation Easier
A few extras can help:
- Painter’s tape to mark spots without marking the wall
- A small mirror to see behind tight spots
- A vacuum to catch drill dust
- An impact driver, only if the kit allows it
Go easy with an impact driver. It can strip a screw head or crush a hole. A drill with a clutch gives you better control. If you plan to hang shelves too, read how to install wall shelves safely.
Choose the Right Furniture Anchoring Kit
Kits come in three main styles. Straps are flexible. Metal brackets are rigid. Cable systems adjust to different gaps. Some makers sell kits built for one model.
Check one thing first. The kit must fit your furniture and your wall. Kits are not universal. Also watch for recalls. In January 2024, the CPSC announced a recall of anti-tip kits because plastic zip ties could turn brittle.
This table compares the main types. I weigh each by how well it matches the furniture and the wall. Always follow the maker’s directions first.
| Hardware type | Advantages | Best application |
|---|---|---|
| Nylon safety straps | Flexible and easy to place | Dressers and bookcases |
| Metal L-brackets | Rigid connection | Compatible cabinets |
| Cable restraint kits | Adjustable connection | Suitable furniture designs |
| Maker-supplied kits | Built for specific furniture | Matching furniture models |
Preparing Tall Furniture Before You Anchor
A little prep prevents extra holes and wasted time. Take ten minutes to get ready.
Empty Drawers, Shelves, and Storage Compartments
Remove books, clothes, and decor. Heavy loads make a piece harder to move. Pull out removable drawers if the maker says so. Keep kids and pets out of the room.
Picture a Saturday morning in a Minneapolis bedroom. You tilt a full dresser to slide it, and a drawer slams open. Not fun. Empty it first. For moving tips, see how to move heavy furniture safely and our guide to furniture sliders for hardwood floors.
Move Furniture Against a Suitable Wall
Pick a solid wall. Avoid spots where a door or window blocks the work. Check for outlets, plumbing, and hidden wires before you drill. A flashlight and a good look go a long way.
Think about the room layout too. Our tips to arrange furniture in a living room can help you place tall pieces where they belong.
Inspect Furniture for Damage
Look for loose joints, cracked panels, and torn backing. Tighten loose hardware as the maker says. Check for a marked anti-tip point.
A weak frame cannot hold a strong strap. If joints wobble, learn how to fix loose furniture joints first. Then continue.
Check the Floor and Furniture Stability
Place the piece on a level floor. Thick carpet and uneven boards can tilt it. Do not shim with cardboard or loose scraps for the long term.
If a piece rocks, see how to level a wobbly dresser. Also protect your floors. Our tips to protect floors from furniture show easy fixes.
Read the Manual and Lay Out Your Kit
Open the box and count every part. Compare the parts to the list. One missing screw can stall the whole job. Read the manual from start to finish before you drill. Look at the pictures twice.
Note which wall types the kit names. Some kits only suit wood studs. Others cover masonry too. Note the screw sizes and pilot hole sizes. Write them on a sticky note.
Plan the order of work. I like to mark the wall and the furniture first. Then I drill. Then I attach. Setting the order in your head saves mistakes. It also keeps the project calm and short.
How to Anchor Tall Furniture Safely: Step-by-Step Guide
This is the heart of the job. Work in order. Read your kit’s manual before step one. The maker’s directions win over any general advice, including mine.
1. Identify the Furniture’s Anchor Points
Open the assembly manual. Look for the marked mounting spot. It is often on the upper frame or the back rail.
Check the back panel. Thin decorative backing is a poor anchor. Do not screw into it unless the maker says it is built for that. Need the manual again? Our guide to assemble flat-pack furniture can help you read the parts.
2. Find and Mark the Wall Studs
Turn on the stud finder. Hold it flat on the wall. Slide it slowly sideways. Mark the spot where it signals. Keep sliding and mark where it stops. The center sits between the marks.
Scan again from the other side. Both scans should match. A stud is about 1.5 inches wide, so there is little room for error. Scan up and down too. A real stud runs straight.
Pipes and wires can fool some tools. Go slow near outlets and switches.
How to Find Wall Studs Without a Stud Finder
Look at outlets and switches. Their boxes often attach to a stud, so one may be close. That is a clue, not proof.
In many U.S. homes, studs sit 16 inches apart, center to center. Some sit 24 inches apart. Measure from a corner to guess the next one.
Tap the wall. A dull, solid sound hints at a stud. A hollow sound means empty space. A thin finish nail can confirm a stud, but only in a hidden spot and only after you check for wires and pipes. House plans can help too. When in doubt, buy a stud finder. They are cheap.
3. Position the Anti-Tip Bracket or Safety Strap
Hold the furniture-side bracket against the marked spot. Line it up with the point in the manual. Mark the screw holes with a pencil.
Now check the gap. The furniture must sit close to the wall. A strap should not bend or pinch. If the piece has a baseboard behind it, plan for that gap.
4. Drill the Required Pilot Holes
Pick the bit the manual names. A pilot hole stops the wood from splitting. It also keeps the screw straight.
Keep the drill level and steady. Do not push hard. Stop if you meet metal or feel odd resistance. Avoid spots near wires or pipes. Wear safety glasses.
5. Attach the Hardware to the Furniture
Fix the furniture-side bracket first. Use the screws from the kit. Tighten until snug. Stop before the wood strips.
Wiggle the bracket. It should not move. If it does, the hole may be stripped. Fix that before you go on.
6. Secure the Bracket to the Wall
Hold the wall bracket over the stud mark. Drive the screws through the bracket and into the stud. Use the screws from the kit, or the type the maker names.
Never swap in plain drywall screws. They are not made for this load. Tighten firmly, but stop before the head strips.
7. Connect the Furniture and Wall Anchors
Link the strap or restraint as the diagram shows. Take out the slack. The strap should be taut, not stretched hard.
Slack is risky. A loose strap lets the piece tilt and gain speed before it stops. Check that the strap sits fully in its clip or slot. Make sure it is not twisted.
8. Inspect the Installation
Check every screw. Look for gaps, cracks, or bent metal. Confirm the strap is straight and tight.
Both ends matter equally. A strong strap cannot save a weak mount. Do not treat a hard pull as proof that the job is safe. A pull test shows little about how the anchor handles a real fall. Follow the maker’s own inspection steps instead.
A Quick Walkthrough for Anchoring a Dresser
Start with an empty dresser. Push it near the wall. Find the anchor point on the back top rail. Mark the stud behind it.
Pull the dresser out a little. Attach the furniture bracket. Slide the dresser back. Attach the wall bracket to the stud. Join the strap and take out the slack.
Now test the drawers. Open each one. A drawer that hits the strap needs a new spot. Put clothes back with the heavy ones low. Many new dressers ship with hardware, so check the box first.
A Quick Walkthrough for Anchoring a Tall Bookcase
Bookcases are tall and narrow, so they need extra care. Remove the shelves if the design allows. Check the back panel. Many bookcases have thin hardboard backs. Use the top frame rail instead, as the manual shows.
Mark the stud. Fit the brackets near the top. Strap the case snug. Reload with heavy books on the bottom shelves.
Wide bookcases may need more than one anchor. The manual decides. If it does not say, ask the maker.
When to Call a Professional Installer
Some jobs need a pro. Call one if you find odd walls, such as crumbly plaster or metal studs. Call one if you cannot find a stud at all. Call one for masonry if you lack a hammer drill.
A handyman can often finish this job fast. Ask about licensed help for work near wiring or plumbing. The fee is small next to the risk of a failed anchor. Safety is worth it.
Screw Length, Depth, and Tightness Explained
The screw has to reach the stud. A screw that only grabs drywall is not enough. The kit sets the length, so use what it names. If you swap in your own screws, you take on the risk.
Drive the screw until the bracket sits flat. Then stop. Over-driving can strip the wood and kill the grip. If a screw spins freely, the hole is stripped. Move to a fresh spot on the stud and try again.
Good screws feel firm at the end. They do not wobble. If the bracket shifts when you push it, fix it now.
How Tight Should a Safety Strap Be?
Aim for snug. The strap should have no loose slack. It should not pull the piece hard against the wall either. Too much tension can bend a bracket or warp a thin back panel.
Check the strap with the drawers open and closed. The strap should stay straight in both cases. If the piece must sit away from the wall, use a strap length the maker approves.
Anchoring Tall Furniture to Different Wall Types
Not every home has the same walls. The right fix depends on what is behind the surface. A standard wood screw is not a universal answer.
This table sums up each wall type. I always match the fastener to the wall first. Then I pick the bracket. That order prevents most failures.
| Wall type | Preferred attachment approach | Important precaution |
|---|---|---|
| Drywall | Suitable wood stud connection | Do not rely on drywall alone |
| Plaster and lath | Verified structural framing | Prevent plaster cracking |
| Brick | Compatible masonry fastener | Check brick condition |
| Concrete | Rated concrete anchoring system | Use the correct masonry bit |
| Metal-stud wall | Engineered attachment solution | Seek compatible hardware guidance |
Anchoring Furniture to Drywall
Drywall is soft. It is made of chalky gypsum. A plain plastic plug can pull right out under force. So do not rely on drywall alone.
Find a wood stud and screw into it. Use the screws that suit the kit. If no stud lines up with your bracket, slide the piece a bit. Or ask a pro about a rated option. Do not fall back on a basic drywall plug.
Metal studs are different. Wood screws do not grip well. Look for hardware made for metal studs, or call a pro.
Plaster and Lath Walls
Old plaster sits over thin wood strips called lath. It is harder and more brittle than drywall. It can chip or crack when you drill.
A stud finder may struggle here. Try a deep scan mode. Look for nail lines too. Place painter’s tape over the spot to cut chipping. Drill slowly. Your goal is the wood framing behind the plaster. Stay away from loose edges and cracks.
Brick or Concrete Walls
Masonry needs masonry gear. You will need a hammer drill, a masonry bit, and an anchor made for brick or concrete. Wear safety glasses and a dust mask.
Match the anchor to the wall. Read the anchor maker’s guide on where to drill and how deep. Crumbly mortar or cracked brick is a poor base. Pick another spot.
If you are unsure, hire a pro. A bad masonry anchor can look fine and still fail.
Metal Studs and Other Tricky Walls
Some newer apartments and offices use thin metal studs. Wood screws slip in them. Fasteners made for metal studs exist, but fit matters. Use the kit maker’s advice or ask a pro.
Some walls hide blocking, which is a wood board between studs. It can give a solid base. Do not guess where it sits.
Tile and paneling add another twist. Drill tile with the right bit. Go slow to avoid cracks. If the wall is unusual, pause. Take photos and ask a pro. A small fee beats a failed anchor.
Anchoring Furniture in Older American Homes
Older homes can hide surprises. Plaster may be wavy. Studs may not follow the 16 or 24 inch pattern. Framing may be uneven.
Scan more than once. Check for wires and pipes with extra care, since old homes often have patched runs. Take your time here. When the wall looks odd, a handyman can save you grief. If you are caring for a vintage piece too, see how to care for wood furniture.
Common Furniture Anchoring Mistakes to Avoid
Even a good kit can fail if you install it poorly. Here are the slips I see most.
Attaching Anchors Only to Weak Drywall
Drywall can crumble and pull away. A drywall plug holds a picture. It does not hold a falling dresser. Always find a stud or a rated masonry fastener.
Using the Wrong Screws or Brackets
Do not mix parts from different kits. Do not swap in short screws. Check the maker’s list. If a screw is missing, order the right one. Do not guess.
Installing Anchors Too Low or in the Wrong Position
Location matters. Most makers want the hardware high on the back of the piece. A low anchor gives less help against tipping. Follow the model’s own instructions.
Leaving Too Much Slack in Safety Straps
Slack lets a piece tilt before the strap catches it. By then, it has speed. Take out the slack. Do not force the furniture against the wall, though.
Ignoring Uneven Floors and Heavy Top Shelves
Keep heavy items low. Put light things up high. Do not leave toys or treats on top. They tempt kids to climb. Fix any rocking before you anchor. See our best dressers for small bedrooms if you want a lower, more stable piece.
Forgetting to Anchor Furniture After Moving
Picture a homeowner in Ohio. She rearranges the living room and moves a tall bookcase. Then she forgets to reconnect the strap. Weeks pass, and the shelf stands loose.
This happens a lot. Every move should trigger a new check. Look at old screw holes. Replace damaged parts. Then reattach. Learn how to secure a bookshelf to the wall every time you move one.
Trusting Adhesive Pads as a Full Fix
Sticky pads and tape sound neat. But they are not a stud anchor. Heat, dust, and paint can weaken them. A fall pulls hard in a single moment. Use stud-mounted hardware as your main fix.
Skipping the Manual
Every kit differs. The manual lists the right screws, spots, and wall types. Skip it and you may use the wrong part. Take five minutes to read it. Then keep it in a drawer for later.
Anchoring Tall Furniture in Rental Homes
Renters face one more hurdle. You want safe furniture, but you also want your deposit back. Good news: you can do both.
Check Your Lease and Ask the Landlord
Read the lease. Look for wall rules. Then ask before you drill. Most landlords say yes to safety. Ask where holes are fine and who patches them. Get the answer in writing.
For furniture that suits rentals, see our renter-friendly furniture ideas and small apartment furniture ideas.
Understand the Limits of No-Drill Furniture Anchors
Adhesive straps sound easy. But I do not treat them as equal to a stud-mounted anchor. Glue can fail on paint, dust, or heat. It may not hold in a real fall.
Never rely on weight alone, either. A heavy piece can still tip. If you cannot drill, talk to your landlord. Do not settle for a weaker fix.
Choose a Suitable Installation Method
Ask the landlord to approve stud-mounted hardware. Small screw holes are easy to patch. If you feel unsure, hire a handyman.
Keep the kit’s box and manual. You will need them when you move. They also help if you replace a part.
Protect Walls During Installation
Measure twice and drill once. Mark with painter’s tape. Place a drop cloth below. Use as few holes as you can.
When you move out, remove the hardware. Fill the holes with spackle. Touch up the paint. Check your lease for repair rules.
Talking With Your Landlord: What to Say
Keep it short and kind. Say you want to anchor a tall dresser for safety. Name the spot and the screw size. Offer to patch and paint when you leave. Send it by email so you have a record.
Most landlords welcome the request. If one says no, ask about other stud-mounted options. Do not drop the plan. A safe home is worth a polite second try.
Moving Out: Removing Anchors and Patching Holes
Plan this early. Keep a small tub of spackle, a putty knife, and matching paint. Unscrew the brackets and fill each hole. Let it dry. Sand it lightly. Then dab on paint.
Take photos of the finished wall. They help if a dispute comes up. Pack the strap and bracket kit with the furniture. You will need them in your next home. Do not leave the anchor behind.
How to Maintain and Inspect Furniture Wall Anchors
Anchoring is not a one-time job. Walls shift. Screws loosen. Straps wear down. A short routine keeps your setup safe.
Check Screws, Brackets, and Safety Straps
Look for loose screws. Look for frayed nylon. Look for bent or rusty brackets. Replace any damaged part right away.
Watch for recalls too. Search your kit’s brand on the CPSC site. In 2024, a recall covered kits with zip ties that could turn brittle.
Replace Old Hardware and Recalled Kits
Nylon, plastic, and metal parts all age. Sun and heat can weaken straps. Plastic can turn brittle. If a part looks worn, replace it. Buy a kit made for your furniture. Throw the old one out.
Never reuse a bent bracket. Never stretch a worn strap just to save a few dollars. You can also report a problem product at SaferProducts.gov.
Inspect Furniture After Moving or Cleaning
Moving a piece can undo your work. Cleaning can too. After either, look at the strap and screws. Reconnect anything you removed. Do it right away, not later.
Need cleaning tips that keep furniture sound? See how to clean furniture without damage.
Watch for Signs of Wall or Furniture Damage
Warning signs include:
- Cracks around the mount
- A bracket that moves or pulls away
- Damaged furniture panels
- Loose or crumbling masonry
Seasons can matter. Humidity can swell wood and loosen screws. Learn how to protect furniture during seasonal changes.
Create a Simple Furniture Safety Inspection Routine
Check busy pieces more often. Look again after any room rearrangement. Follow the schedule in the maker’s manual.
I keep a short checklist on my phone. It takes about five minutes per room. This table gives you a final check you can use right after install and again later. Each line is a quick yes or no.
| Inspection point | What to check |
|---|---|
| Wall connection | Correct structural attachment |
| Furniture connection | Secure mounting point |
| Screws | Correct type and size |
| Safety strap | Properly connected |
| Furniture position | Stable and level |
| Drawers | Heavy items stored low |
| Shelves | No tempting climbing objects |
| Hardware | No visible damage |
A Yearly Safety Check for Every Room
Once a year, walk through your home with this list. Start in the kids’ rooms. Then do the living room, the office, and the kitchen. Look at each tall piece. Tug the strap by hand. Check for new cracks near the mount.
Also check what sits on top. Remove tempting items. Move heavy loads down. Add a new anchor for any piece that lacks one. A yearly check takes less than an hour for most homes.
Securing TVs and Other Top-Heavy Items Around the Home
Furniture is not the only thing that tips. TVs, pantry units, and office storage count too. Here is how I handle them.
TV Tip-Over Prevention on Dressers and Stands
A TV on a dresser adds weight up high. Many dressers were not built for that. The CPSC says to anchor TVs and furniture. If you cannot anchor a TV, put it on a sturdy, low base. Push it back as far as you can. Keep cords out of reach.
Wall mounting can also help. Mount the TV high, and use hardware rated for its weight. Then anchor the stand or dresser too. Each step adds safety.
Entertainment Centers, Pantries, and Office Storage
Entertainment centers hold heavy gear on tall frames. Anchor them just like a bookcase. See our living room furniture ideas for safer layouts.
Pantry units fill up with cans and jars. Keep the heavy items low. Anchor the frame to a stud.
Filing cabinets tip when you pull a top drawer. Put the heavy files in the bottom drawer. Our home office furniture setup guide shows how to plan the room.
Smart Room Layouts That Lower the Risk
Place tall pieces away from play areas and busy doors. Keep climbable items away from windows and cords. A clear layout cuts risk before you even pick up a drill.
Spare rooms need the same care. Our guest bedroom setup ideas help you plan one. In a baby room, run through a baby room safety checklist and anchor every tall piece.
Expert Advice From the CPSC and Safety Standards
I lean on official sources for safety claims. Here is what they say. I add my own notes where I can.
What the CPSC Recommends
The U.S. Consumer Product Safety Commission runs the Anchor It! campaign. It began in 2015. Its main advice is simple: anchor TVs and furniture, like bookcases and dressers, to the wall. It also says adults should still supervise kids.
In February 2026, CPSC Acting Chairman Peter A. Feldman again urged families to anchor. His point was that a few minutes of work can prevent a tragedy. Find the details on the CPSC site and at AnchorIt.gov.
If a tip-over or near miss happens at home, report it at SaferProducts.gov.
How I Weigh Maker Advice Against General Tips
Two kinds of advice exist. One is the maker’s manual for your exact kit and piece. The other is general DIY guidance, like this article. When they differ, the manual wins. It reflects the design and testing of that product.
General tips fill gaps. They explain why a step matters. They also help you spot trouble, like a weak wall. But they cannot replace the manual. I also never claim that a hand pull proves an anchor is safe. It does not. Follow the steps, and when in doubt, ask a pro.
Federal Rules for Clothing Storage Units
The STURDY Act led to a federal rule, 16 CFR Part 1261. It adopts ASTM F2057-23 for clothing storage units made after September 1, 2023. Read the CPSC announcement for details.
The rule covers clothing storage units, such as many dressers. It does not cover every bookcase or tall piece. It also does not remove the need to anchor. ASTM F3096 covers tip restraints used with those units.
When you shop, ask the seller about the standard. Our chest of drawers buying guide can help you compare options.
Frequently Asked Questions About Anchoring Tall Furniture
Do All Tall Furniture Pieces Need to Be Anchored?
Any tall, narrow, or top-heavy piece can tip. The CPSC urges anchoring for items such as dressers and bookcases. Anchor first the pieces kids can climb.
Can I Anchor a Tall Dresser Without Drilling Into the Wall?
No-drill options exist, but they have limits. A stud-mounted anchor gives a stronger link. If you rent, ask your landlord about small screw holes. They are easy to patch.
Can Furniture Be Anchored Directly to Drywall?
Drywall alone is a weak base. Screw into a wood stud instead. If no stud lines up, move the piece or ask a pro about a rated fix.
How Many Anchors Does a Tall Bookshelf Need?
It depends on the design and the maker’s directions. Wide pieces may need two points. Read the manual, and see our tall bookcase buying guide for stable designs.
Are Furniture Anti-Tip Kits Universal?
No. Straps, screws, and brackets vary. Check that the kit fits your furniture material and wall type. Use the parts the maker names.
Can I Use TV Safety Straps for a Tall Bookcase?
Use hardware meant for the job. A TV strap may not fit a bookcase or carry the load. Pick a kit made for furniture.
Should I Anchor Furniture Even If I Don’t Have Children?
Yes. Adults, older people, guests, and pets can all get hurt. The CPSC notes that older adults face rising injury numbers. For a wider look, read about childproofing your furniture, which helps any household.
How Often Should Furniture Anchors Be Checked?
Do a quick look every few months. Check again after you move furniture. Also check if you see damage or a recall.
Does New Furniture Already Come With Anti-Tip Hardware?
Many new dressers include it, since the federal rule applies to qualifying clothing storage units made after September 1, 2023. Check the box. Install it anyway. It does nothing sitting in the packaging.
What If My Furniture Sits Against a Baseboard?
A baseboard can hold the piece away from the wall. Do not let a strap yank it back hard. Some kits include spacers. Check the manual for the right way to handle the gap.
Should I Anchor a TV on a Dresser Too?
Yes. A TV adds weight high up. Anchor both the TV and the dresser. A low stand made for TVs, or a wall mount, is a safer base.
What If I Cannot Find a Stud Behind My Furniture?
Slide the piece to a spot where a stud lines up. Or ask a pro about a rated fix. Do not use a drywall plug alone.
Final Recommendation
I treat anchoring as part of setting up any room. If you want to know how to anchor tall furniture safely, start with a stud and a kit that fits your piece. Take out the slack, and check the work twice. Then check again after every move. I would never skip this step in a nursery or kids’ room. Pair it with smart layouts, like our bedroom furniture layout ideas, and keep heavy items low.

Shakitul Alam is a seasoned interior design consultant and furniture expert with over 15 years of hands-on experience in home decor, space optimization, and furniture craftsmanship. He holds a Bachelor’s degree in Interior Architecture & Design from the University of California, Berkeley (UC Berkeley), where he developed a deep passion for functional aesthetics and modern home living.
Throughout his 15+ year career, Shakitul has worked closely with leading interior design firms, furniture manufacturers, and residential clients across the United States. His expertise spans ergonomic furniture selection, material durability analysis, budget-friendly living room setups, and sustainable interior design trends.
At Looky Furniture, Shakitul leads the editorial and product evaluation team. He personally tests, researches, and reviews home furnishings to provide readers with accurate, practical, and unbiased buying guides. His mission is to help homeowners and renters make informed decisions, transforming everyday spaces into stylish, comfortable, and functional homes.
When he isn’t evaluating the latest furniture designs, Shakitul enjoys studying eco-friendly woodworking techniques and exploring minimalist architectural trends.